 Source code editor
What Is Ajax
↑
 Source code editor
What Is Ajax
↑
This section does not apply to MySQL Community Server users.
This section contains information about the components, installation and initial configuration requirements for installing MySQL Enterprise.
This section does not apply to MySQL Community Server users.
To obtain MySQL Enterprise, visit http://www.mysql.com/products/enterprise/. The platforms that are officially supported for MySQL Enterprise are listed at http://www.mysql.com/support/supportedplatforms.html.
To install MySQL Enterprise, you should install the main distribution plus the latest available service pack or hot-fix. You only need to install the latest service pack or hot-fix – this will include all updates since the previous main distribution release. For platforms that do not have a MySQL Enterprise Server installer, use the Community Server instructions (see Section 2.4, “Installing MySQL Community Server”).
This section does not apply to MySQL Community Server users.
Enterprise Server releases will be created for the following packages from the MySQL 5.0 tree:
mysql-enterprise: Released under a
commercial license and includes the following storage engines:
MyISAM, MEMORY,
MERGE, InnoDB,
ARCHIVE, BLACKHOLE,
EXAMPLE, FEDERATED.
mysql-enterprise-gpl: Same as
mysql-enterprise, but released under the
GPL.
mysql-cluster:
mysql-enterprise plus MySQL Cluster
(NDB).
mysql-classic: Released under a commercial
license, does not include InnoDB.
mysql-community: Same as
mysql-enterprise-gpl, but available for the
community, and released every 6 months.
To satisfy different user requirements, we provide several servers. mysqld is an optimized server that is a smaller, faster binary. mysqld-debug is compiled with debugging support but is otherwise configured identically to the non-debug server.
Each of these servers is compiled from the same source distribution, though with different configuration options. All native MySQL clients can connect to servers from either MySQL version.
This section does not apply to MySQL Community Server users.
Installers for MySQL Enterprise are available for the Windows and Mac OS X. For other platforms, you will need to use the TAR, Zip or native package format (RPM, Solaris PKG) pafiles to perform the installation.
This section does not apply to MySQL Community Server users.
The Enterprise MySQL Server installer installs the MySQL server and the MySQL Server Configuration Wizard, and enables you to run the configuration wizard to set up and configure your server before use.
To start the installation process:
Download the
mysql-enterprise
file and extract the VERSION-win32.zipSetup.exe file.
You should double-click on this file to start the
installation process.
The opening screen provides an overview of what the installer will achieve. Click to continue.

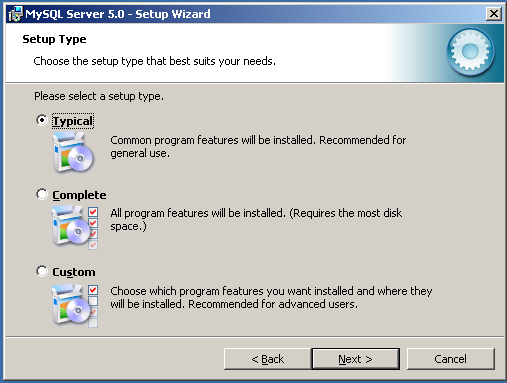
Choose your installation type. The Typical installation installs the main server and associated components, but does not include the developer libraries. The Complete installation installs everything. The Custom installation enables you to select which components are installed. Choose your installation and click to continue.
If you have selected the custom installation, you need to choose which components are installed. Click to continute.

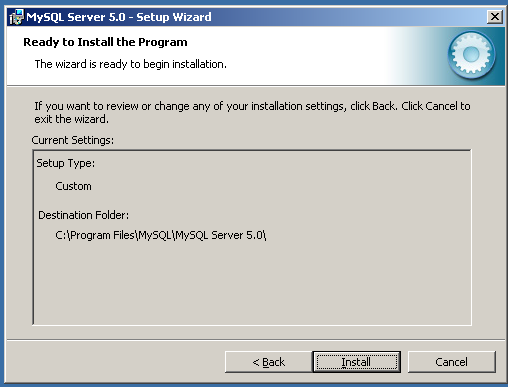
The installation choices you have made will be summarized for you. If you have made a mistake, you can click to choose an alternate installation type. If you are ready to continue, choose .
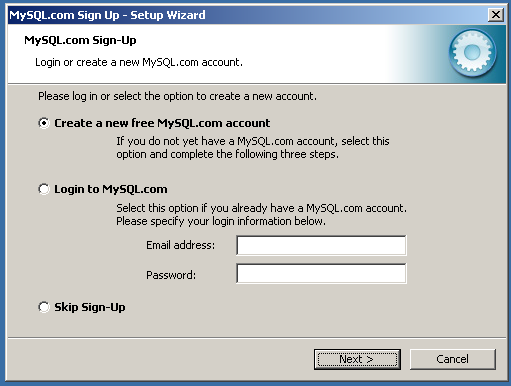
You can optionally set up your a connection to your MySQL.com account by entering your login details, or you can create a new account, or you can skip the MySQL.com signup.
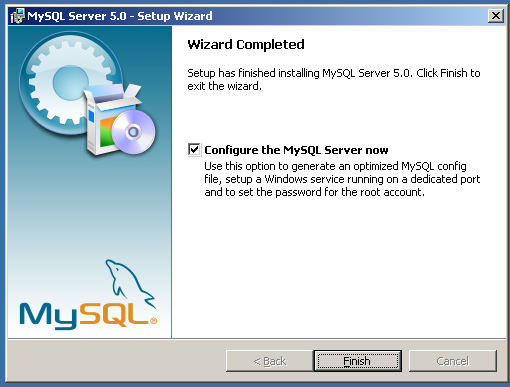
The installation should proceed, installing the components you have selected. Once the installation has completed, you will get the opportunity to start the MySQL Instance Configuration Wizard. Untick the box if you do not want to run the wizard at this time. Click to complete the installation. If you have opted to run the wizard, then it will be started once the installer has completed.
If you selected to run the MySQL Configuration Wizard, see Section 2.3.3.2, “MySQL Server Configuration Wizard”.
The MySQL Server Configuration Wizard helps automate the process of
configuring your server. It creates a custom MySQL configuration
file (my.ini or my.cnf) by
asking you a series of questions and then applying your responses to
a template to generate the configuration file that is tuned to your
installation.
The MySQL Server Configuration Wizard is included with the MySQL 5.0 server. For Community Server users, the MySQL Server Configuration Wizard is available only for Windows. For Enterprise Server users, the MySQL Server Configuration Wizard is included as part of the standard Enterprise Installer.
The MySQL Server Configuration Wizard is to a large extent the result of feedback that MySQL AB has received from many users over a period of several years. However, if you find that it lacks some feature important to you, please report it in our bugs database using the instructions given in Section 1.8, “How to Report Bugs or Problems”.
The MySQL Server Configuration Wizard is normally started as part of the installation process. You should only need to run the MySQL Server Configuration Wizard again when you need to change the configuration parameters of your server.
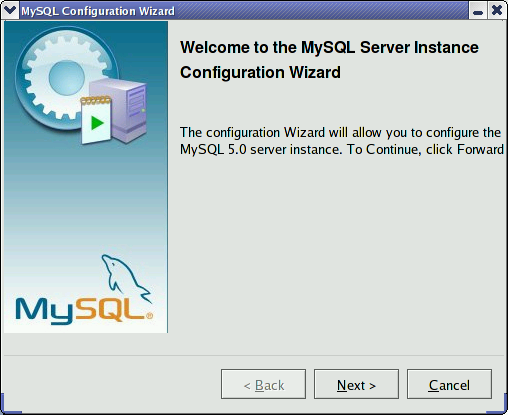
You can launch the MySQL Configuration Wizard by clicking the entry in the section of the Windows menu.
Alternatively, you can navigate to the bin
directory of your MySQL installation and launch the
MySQLInstanceConfig.exe file directly.
The MySQL Server Configuration Wizard places the
my.ini file in the installation directory
for the MySQL server. This helps associate configuration files
with particular server instances.
To ensure that the MySQL server knows where to look for the
my.ini file, an argument similar to this is
passed to the MySQL server as part of the service installation:
--defaults-file="C:\Program Files\MySQL\MySQL Server 5.0\my.ini"
Here, C:\Program Files\MySQL\MySQL Server
5.0 is replaced with the installation
path to the MySQL Server. The --defaults-file
option instructs the MySQL server to read the specified file for
configuration options when it starts.
Apart from making changes to the my.ini
file by running the MySQL Server Configuration Wizard again, you
can modify it by opening it with a text editor and making any
necessary changes. You can also modify the server configuration
with the
MySQL
Administrator utility. For more information about server
configuration, see Section 5.2.2, “Command Options”.
MySQL clients and utilities such as the mysql
and mysqldump command-line clients are not
able to locate the my.ini file located in
the server installation directory. To configure the client and
utility applications, create a new my.ini
file in the Windows installation directory (for example,
C:\WINDOWS).
Under Windows Server 2003, Windows Server 2000 and Windows XP,
MySQL Server Configuration Wizard will configure MySQL to work
as a Windows service. To start and stop MySQL you use the
Services application that is supplied as
part of the Windows Administrator Tools.
This section does not apply to MySQL Community Server users.
To start the MySQL Configuration Wizard on Linux, you must run
the mysqlsetup command. You must be running
an X Windows System server for the MySQL Server Configuration
Wizard.
To display the MySQL Server Configuration Wizard interface on a
different machine, set the value of the
DISPLAY variable on the command line:
shell>
DISPLAY=remote:0.0 mysqlsetup
The MySQL Server Configuration Wizard places the
my.cnf file in the
/etc directory.
This configuration file is automatically used when
mysqld is started. The standard MySQL server
initialization script, typically located within
/etc/init.d/mysql, will also use this file
automatically.
Apart from making changes to the my.ini
file by running the MySQL Server Configuration Wizard again, you
can modify it by opening it with a text editor and making any
necessary changes. You can also modify the server configuration
with the
MySQL
Administrator utility. For more information about server
configuration, see Section 5.2.2, “Command Options”.
If the MySQL Server Configuration Wizard detects an existing configuration file, you have the option of either reconfiguring your existing server, or removing the server instance by deleting the configuration file and stopping and removing the MySQL service.
To reconfigure an existing server, choose the option and click the button. Any existing configuration file is not overwritten, but renamed (within the same directory) using a timestamp (Windows) or sequential number (Linux). To remove the existing server instance, choose the option and click the button.
If you choose the
option, you advance to a confirmation window. Click the
button. The MySQL Server
Configuration Wizard stops and removes the MySQL service, and then
deletes the configuration file. The server installation and its
data folder are not removed.
If you choose the option, you advance to the dialog where you can choose the type of installation that you wish to configure.
When you start the MySQL Server Configuration Wizard for a new MySQL installation, or choose the option for an existing installation, you advance to the dialog.
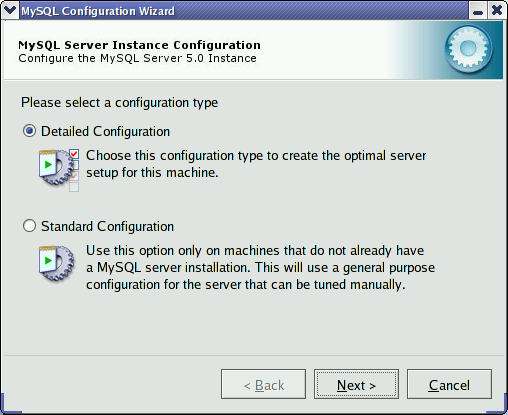
There are two configuration types available: and . The option is intended for new users who want to get started with MySQL quickly without having to make many decisions about server configuration. The option is intended for advanced users who want more fine-grained control over server configuration.
If you are new to MySQL and need a server configured as a single-user developer machine, the should suit your needs. Choosing the option causes the MySQL Configuration Wizard to set all configuration options automatically with the exception of and .
The sets options that may be incompatible with systems where there are existing MySQL installations. If you have an existing MySQL installation on your system in addition to the installation you wish to configure, the option is recommended.
To complete the , please refer to the sections on and in Section 2.3.3.2.10, “The Service Options Dialog”, and Section 2.3.3.2.11, “The Security Options Dialog”, respectively.
There are three different server types available to choose from. The server type that you choose affects the decisions that the MySQL Server Configuration Wizard makes with regard to memory, disk, and processor usage.

: Choose this option for a typical desktop workstation where MySQL is intended only for personal use. It is assumed that many other desktop applications are running. The MySQL server is configured to use minimal system resources.
: Choose this option for a server machine where the MySQL server is running alongside other server applications such as FTP, email, and Web servers. The MySQL server is configured to use a moderate portion of the system resources.
: Choose this option for a server machine that is intended to run only the MySQL server. It is assumed that no other applications are running. The MySQL server is configured to use all available system resources.
By selecting one of the preconfigured configurations, the values
and settings of various options in your
my.cnf or my.ini will
be altered accordingly. The default values and options as
described in the reference manual may therefore be different to
the options and values that were created during the execution of
the configuration wizard.
The dialog allows you to
indicate the storage engines that you expect to use when creating
MySQL tables. The option you choose determines whether the
InnoDB storage engine is available and what
percentage of the server resources are available to
InnoDB.
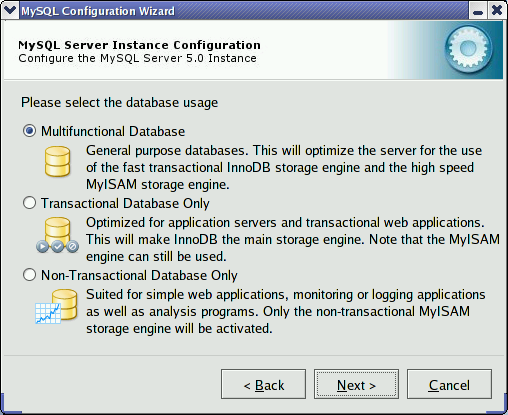
: This
option enables both the InnoDB and
MyISAM storage engines and divides
resources evenly between the two. This option is recommended
for users who use both storage engines on a regular basis.
: This
option enables both the InnoDB and
MyISAM storage engines, but dedicates most
server resources to the InnoDB storage
engine. This option is recommended for users who use
InnoDB almost exclusively and make only
minimal use of MyISAM.
:
This option disables the InnoDB storage
engine completely and dedicates all server resources to the
MyISAM storage engine. This option is
recommended for users who do not use
InnoDB.
Some users may want to locate the InnoDB
tablespace files in a different location than the MySQL server
data directory. Placing the tablespace files in a separate
location can be desirable if your system has a higher capacity or
higher performance storage device available, such as a RAID
storage system.
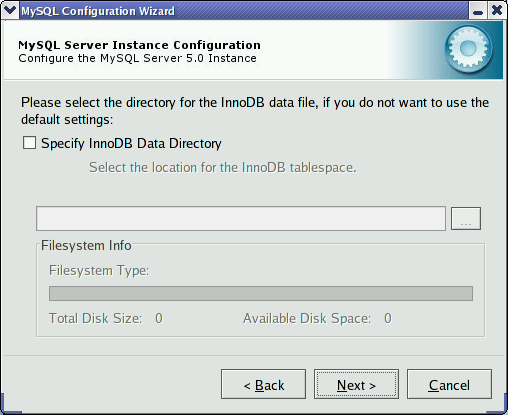
To change the default location for the InnoDB
tablespace files, choose a new drive from the drop-down list of
drive letters and choose a new path from the drop-down list of
paths. To create a custom path, click the
button.
If you are modifying the configuration of an existing server, you must click the button before you change the path. In this situation you must move the existing tablespace files to the new location manually before starting the server.
To prevent the server from running out of resources, it is important to limit the number of concurrent connections to the MySQL server that can be established. The dialog allows you to choose the expected usage of your server, and sets the limit for concurrent connections accordingly. It is also possible to set the concurrent connection limit manually.
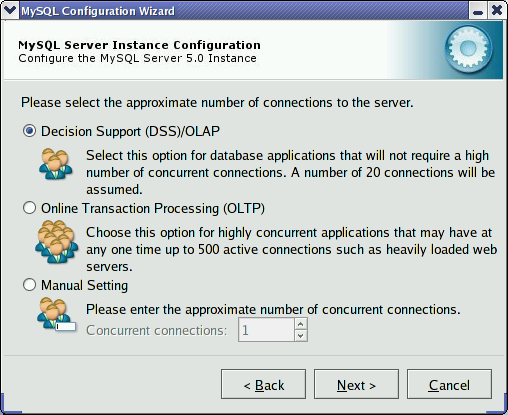
: Choose this option if your server does not require a large number of concurrent connections. The maximum number of connections is set at 100, with an average of 20 concurrent connections assumed.
: Choose this option if your server requires a large number of concurrent connections. The maximum number of connections is set at 500.
: Choose this option to set the maximum number of concurrent connections to the server manually. Choose the number of concurrent connections from the drop-down box provided, or enter the maximum number of connections into the drop-down box if the number you desire is not listed.
Use the dialog to enable or disable TCP/IP networking and to configure the port number that is used to connect to the MySQL server.
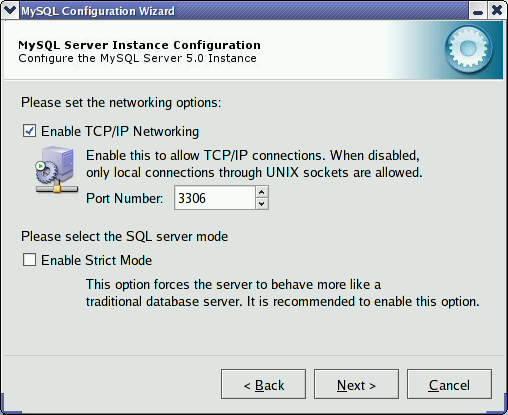
TCP/IP networking is enabled by default. To disable TCP/IP networking, uncheck the box next to the option.
Port 3306 is used by default. To change the port used to access MySQL, choose a new port number from the drop-down box or type a new port number directly into the drop-down box. If the port number you choose is in use, you are prompted to confirm your choice of port number.
Set the to either enable or disable strict mode. Enabling strict mode (default) makes MySQL behave more like other database management systems. If you run applications that rely on MySQL's old “forgiving” behavior, make sure to either adapt those applications or to disable strict mode. For more information about strict mode, see Section 5.2.6, “SQL Modes”.
The MySQL server supports multiple character sets and it is possible to set a default server character set that is applied to all tables, columns, and databases unless overridden. Use the dialog to change the default character set of the MySQL server.

: Choose this
option if you want to use latin1 as the
default server character set. latin1 is
used for English and many Western European languages.
:
Choose this option if you want to use utf8
as the default server character set. This is a Unicode
character set that can store characters from many different
languages.
: Choose this option if you want to pick the server's default character set manually. Choose the desired character set from the provided drop-down list.
This section does not apply to MySQL Community Server users.
On Windows platforms, the MySQL server can be installed as a Windows service. When installed this way, the MySQL server can be started automatically during system startup, and even restarted automatically by Windows in the event of a service failure.
The MySQL Server Configuration Wizard installs the MySQL server as
a service by default, using the service name
MySQL. If you do not wish to install the
service, uncheck the box next to the option. You can change the service
name by picking a new service name from the drop-down box provided
or by entering a new service name into the drop-down box.
To install the MySQL server as a service but not have it started automatically at startup, uncheck the box next to the option.
It is strongly recommended that you set a
root password for your MySQL server,
and the MySQL Server Configuration Wizard requires by default that
you do so. If you do not wish to set a root
password, uncheck the box next to the option.
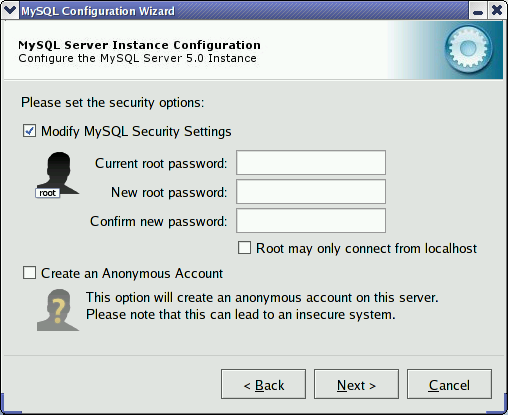
To set the root password, enter the desired
password into both the and
boxes. If you are reconfiguring an existing server, you need to
enter the existing root password into the
box.
To prevent root logins from across the network,
check the box next to the option. This increases the security of
your root account.
To create an anonymous user account, check the box next to the option. Creating an anonymous account can decrease server security and cause login and permission difficulties. For this reason, it is not recommended.
The final dialog in the MySQL Server Configuration Wizard is the . To start the configuration process, click the button. To return to a previous dialog, click the button. To exit the MySQL Server Configuration Wizard without configuring the server, click the button.
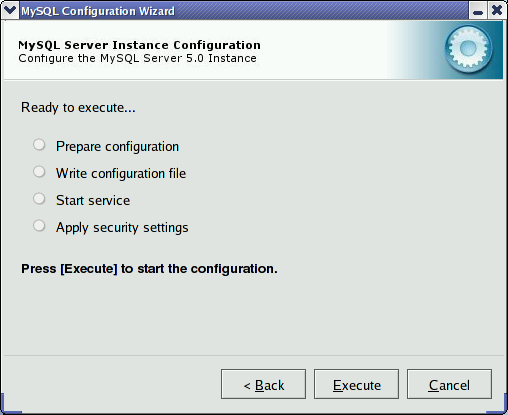
After you click the button, the MySQL Server Configuration Wizard performs a series of tasks and displays the progress onscreen as the tasks are performed.
The MySQL Server Configuration Wizard first determines
configuration file options based on your choices using a template
prepared by MySQL AB developers and engineers. This template is
named my-template.ini and is located in your
server installation directory.
The MySQL Configuration Wizard then writes these options to the corresponding configuration file.
If you chose to create a service for the MySQL server, the MySQL Server Configuration Wizard creates and starts the service. If you are reconfiguring an existing service, the MySQL Server Configuration Wizard restarts the service to apply your configuration changes.
If you chose to set a root password, the MySQL
Configuration Wizard connects to the server, sets your new
root password, and applies any other security
settings you may have selected.
After the MySQL Server Configuration Wizard has completed its tasks, it displays a summary. Click the button to exit the MySQL Server Configuration Wizard.
This section does not apply to MySQL Community Server users.
When upgrading to MySQL Enterprise from Community Server you need only follow the installation process to install and upgrade the packages to the latest version provided by MySQL Enterprise. You will also need to install the latest MySQL Enterprise Service Pack and any outstanding MySQL Hot-fix packs.
Be aware, however, that you must take into account any of the changes when moving between major releases. You should also check the release notes (see Appendix C, MySQL Enterprise Release Notes) for details on major changes between revisions of MySQL Enterprise Server. For details of changes in other packages in MySQL Enterprise, see Appendix E, MySQL Change History.
You should also review the notes and advice contained within Section 2.4.16, “Upgrading MySQL”.
This section does not apply to MySQL Community Server users.
You can uninstall MySQL Enterprise using the standard tools according to your operating system.
When uninstalling, any data files created are not removed. You will need to separately remove these files to completely remove MySQL from your system.
To uninstall MySQL Enterprise on Windows you should use the Add or Remove Programs utility located within the Control Panel.

Packages within MySQL Enterprise must be removed individually. You may also use this option to remove packages that you no longer want or use.
Any data you created while MySQL Enterprise was installed will not be removed. You will need to separately delete this information.
To uninstall MySQL Enterprise on a Linux operating system that uses the RPM package format, you must remove each of the packages that were installed by the MySQL Enterprise Installer individually.
To do this, first obtain a list of the installed packages:
shell> rpm -q -a|grep -i mysql
mysql-docs-en-5.0.26-1
MySQL-server-standard-5.0.26-0.rhel4
mysql-connector-j-5.0.3-1
MySQL-devel-standard-5.0.26-0.rhel4
mysql-query-browser-5.0r4-1rhel4
mysql-connector-odbc-3.51.12-1
MySQL-client-standard-5.0.26-0.rhel4
mysql-administrator-5.0r4-1rhel4
mysql-gui-tools-5.0r4-1rhel4
mysql-setup-wizard-1.0-1
mysql-connector-net-1.0.7-1
You can remove these packages individually, or all together automatically, like this:
shell> rpm -q -a|grep -i mysql|xargs rpm --erase