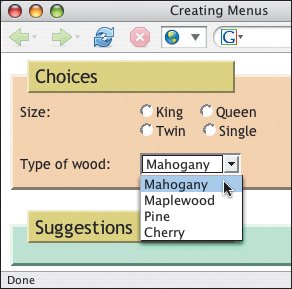
1. | If desired, type the text that will describe your menu.
|
2. | Type <select.

|
3. | Type name="label", where label will identify the data collected from the menu when it is sent to the server.
|
4. | If desired, type size="n", where n represents the height (in lines) of the menu.
|
5. | If desired, type multiple="multiple" to allow your visitor to select more than one menu option (with Ctrl or Command). (The ="multiple" is optional in HTML.)
|
6. | Type >.
|
7. | Type <option.
|
8. | If desired, type selected="selected" if you want the option to be selected by default. (The ="selected" is optional in HTML.)
|
9. | Type value="label", where label identifies the data that will be sent to the server if the option is selected.
|
10. | If desired, type label="menu option", where menu option is the word that should appear in the menu.
|
11. | Type >.
|
12. | Type the option name as you wish it to appear in the menu.
|
13. | Type </option>.
|
14. | Repeat steps 713 for each option.
|
15. | Type </select>.

|
1. | Create a menu as described on page 266.
|
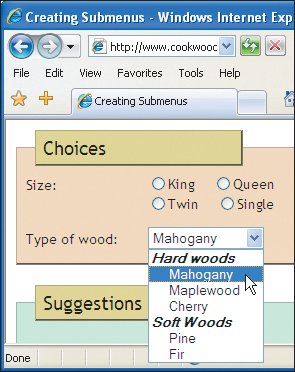
2. | Before the first option tag in the first group that you wish to place together in a submenu, type <optgroup.
|
3. | Type label="submenutitle">, where submenutitle is the header for the submenu.
|
4. | After the last option tag in the group, type </optgroup>.
|
5. | Repeat steps 24 for each submenu.

|
 Best javascript editor debugger
Ajax website
 Best javascript editor debugger
Ajax website