 Debugger script
Dhtml css
I created an example page to get you started. It already includes the elements you worked with in the previous session (HTML, HEAD, BODY, H1, P, UL, LI, ADDRESS, and so on). In this session, you will be learning more about how to set up your HTML document so that it will be fully compliant with HTML 4.01, as well as about using additional elements that have not been covered yet.
To get started using the example page:
Run your text editor.
Open tutor2_example.html from the MyHTML folder (located in your My Documents folder if using Windows, or on your Desktop if using a Macintosh).
Windows users: In Windows Notepad, select File, Open, and open the MyHTML folder (located in your My Documents folder). Select All Files (*.*) as the file type to see tutor2_example.html in the Open window's folder view. Double-click on tutor2_example.html to open it.
| Caution |
Users of Windows Notepad (and most other Windows-based text editors) cannot initially see HTML files (with .html or .htm file extensions), since only text files (with a .txt file extension) are displayed in the Open window's folder view, unless the viewing of all file types is specified. |
Macintosh users: In SimpleText, select File, Open. If the Desktop (or the MyHTML folder) is not already open, click on the Desktop button to open the Desktop, double-click on the MyHTML folder, and then double-click on tutor2_example.html.
Resave tutor2_example.html. In Notepad or SimpleText: Select File and Save As, open the MyHTML folder, type tutor2.html as the file name, and click the Save button.
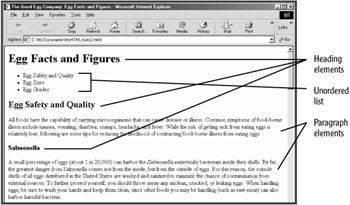
Run your browser and open tutor2.html. (If you need help opening a local HTML file in your browser, see "Opening an HTML File in Your Web Browser" in the previous session.) What you see in your browser should closely match what is shown in Figure 3.1.

Figure 3.1: Heading elements (H1, H2, and H3), a bulleted list (UL), and paragraph elements are already included in the example file.
 Debugger script
Dhtml css